Understanding visual price formations helps traders turn raw movement into actionable insight. In technical analysis, a clear pattern on a price plot reveals the tug of war between buyers and sellers. These formations reflect trend phases and show where momentum may pause, continue, or reverse.
Well-formed structures use trendlines that link highs and lows to mark support and resistance. Volume often tightens during formation and expands on a breakout, giving traders a confirmation signal to weigh against risk controls.
When framed in context, a pattern becomes actionable. It helps identify trend direction, set entries and exits, and define stop levels. Remember: price is the final arbiter—these tools raise the odds but do not guarantee outcomes.
Key Takeaways
- Visual formations distill market psychology and guide technical analysis.
- Trendlines and volume are key to confirming breakout or reversal potential.
- Use patterns within trend context and with defined risk controls.
- Common structures signal continuation or reversal, aiding trade planning.
- Price action confirms ideas—patterns offer probabilities, not certainties.
What Are Chart Patterns in Technical Analysis?
Repeatable price formations organize market moves into recognizable setups that guide decisions. These chart patterns form when traders connect common points—closes, highs, or lows—over time to reveal support resistance lines.
Technical analysis uses these shapes to anticipate direction. Continuation structures (flags, pennants, wedges, triangles) usually signal a pause within an existing trend. Reversal forms (head and shoulders, double or triple tops/bottoms) warn that buyers or sellers may be losing control.
Volume often declines as a formation develops and then spikes on resolution. Longer, larger formations tend to produce stronger moves at breakout. Many analysts prefer drawing lines from closing prices; repeated touches increase the reliability of a zone.
- What a pattern does: it shows crowd psychology from accumulation to distribution.
- How traders use it: to set entries, stops, and measured targets with a clear point of invalidation.
- Limitations: these are probabilistic tools—context, momentum, and larger trends must confirm any signal.
Candlestick fundamentals that shape price movement
Each candle compresses a trading period into a visual snapshot of buyer and seller intent. A clear read of body, shadows, and color helps spot short-term shifts in direction.
Reading the body, shadows, and color for trend direction
A candlestick’s body shows open-to-close action. Shadows show the session high and low. Color signals direction—green for up, red for down. These elements encode the session’s price story.
Common bullish and bearish candlestick setups to watch
- Hammers and inverted hammers at a bottom can foreshadow reversal when a bullish follow-through appears.
- Bullish engulfing and piercing line indicate buyers overwhelming sellers after a decline.
- Morning star and three white soldiers often begin an uptrend with sustained momentum.
- Hanging man, shooting star, bearish engulfing, evening star, three black crows, and dark cloud cover warn of rising downside pressure near a top.
- Doji and spinning tops show indecision; rising/falling three methods signal continuation.

| Setup | Signal | Where to watch |
|---|---|---|
| Hammer / Inverted Hammer | Possible bullish reversal | At a bottom, confirmed by next candle and volume |
| Bullish Engulfing / Piercing | Buyers regain control | After a down move, with rising volume |
| Shooting Star / Hanging Man | Warning of top / reversal | Near prior highs or extended uptrend |
| Doji / Spinning Top | Indecision / consolidation | Inside trends; use multi-timeframe confirmation |
Practical note: Use candlestick reads with key lines, volume, and multi-timeframe analysis to raise probability. Short signals gain strength when they align with a larger trend and valid support or resistance.
Trendlines, support, and resistance: the foundation for patterns
Drawing precise trendlines and horizontal bands reveals where buyers and sellers meet most often. These lines give structure to price action and turn raw moves into repeatable analysis.
Drawing accurate uptrends, downtrends, and consolidation ranges
Draw an uptrend by connecting at least two ascending lows; add a third touch for validation. For downtrends, link descending highs the same way. Use a single straight line between these points to mark the active trend.
When price trades sideways, draw parallel horizontal bands to define the range. A clear breakout from that range often signals expansion after consolidation.
Why closing prices and multi-touch levels increase validity
Many chartists prefer closing prices because closes reflect positions held beyond the period and reduce intraday noise. Trendlines and levels drawn with closes filter out wicks that can distort a level.
More touches equal more reliability. Levels with three or more touches tend to act as real support or resistance levels. Watch for rejections, break-and-retest behavior, and clean closes beyond the band.
“Objective rules for lines and points make your analysis repeatable across timeframes and instruments.”
Annotate and update lines as prices evolve. Support resistance mapping is the backbone for valid entries, stops, and measured targets in technical analysis.
Continuation patterns that signal trend persistence
After a strong impulse, price often rests in short, orderly formations before the move continues. These structures help traders see where the trend may resume and offer defined entries, stops, and targets.
Flags and pennants are brief consolidations that follow a sharp move. Flags slope parallel and usually tilt against the trend. Pennants tighten with converging lines after a clear flagpole. Volume typically falls during the pause and surges on breakout, confirming continuation.
Triangles and wedges include ascending, descending, and symmetrical shapes. Ascending triangles bias higher, descending triangles favor sellers, while symmetrical forms are more neutral. Wedges often angle with the trend and act as short pauses.
Rectangles, channels, and staircases confine price between support and resistance. Traders can trade the range or wait for a decisive break. Staircase sequences show disciplined higher highs/lows or lower highs/lows for steady uptrend or downtrend movement.
Tip: Use volume and pressure cues to filter false breakouts and check higher timeframes so the small formation aligns with the larger bias.
Reversal patterns that indicate a change in direction
Reversal setups form when a prevailing move exhausts and the balance between buyers and sellers shifts. These structures warn traders that a trend reversal may be near.
Head and shoulders / inverse head and shoulders
Three peaks or troughs define this setup. A break of the neckline, ideally on rising volume, confirms the reversal. Use the neckline as support or resistance for entries and stops.
Double and triple tops / bottoms
Double tops and bottoms look like an M or W and resolve when price breaks the neckline or range. Triple tests are rarer but stronger; repeated failures show exhaustion and invite decisive moves.
Wedges, rounding, and V-shaped reversals
Rising wedges compress as momentum fades and often precede a bearish reversal. Falling wedges signal potential bullish reversal.
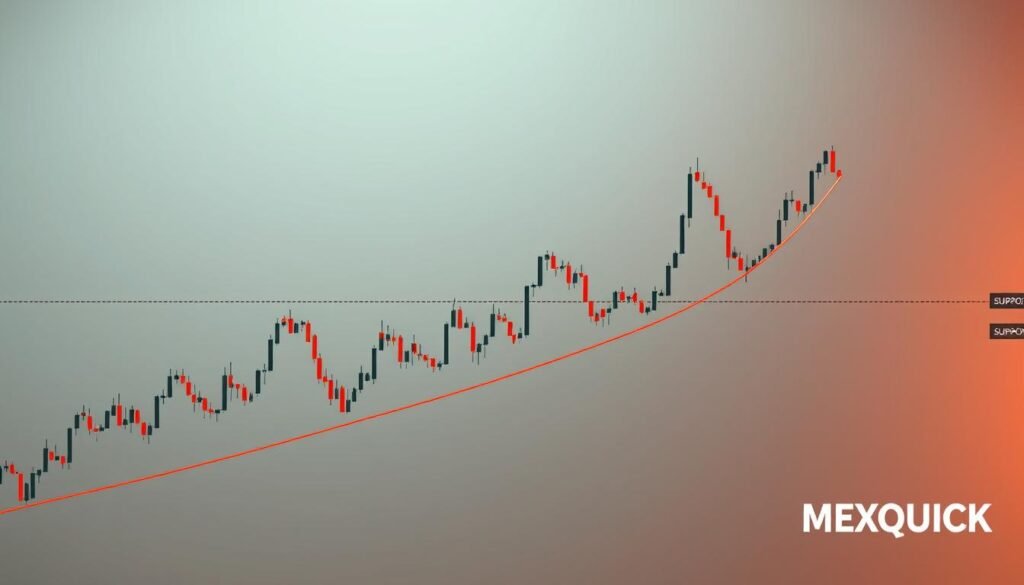
Rounding tops and bottoms show gradual sentiment shifts. V-shaped reversals are sharp and need tighter trade management.
| Form | Confirmation | Trade tip |
|---|---|---|
| Head & Shoulders | Neckline break + volume | Enter on retest; stop above opposite shoulder |
| Double / Triple | Range break | Measure height for target; watch time spent testing |
| Wedge / Rounding / V | Break of trendline or rapid reversal | Use higher timeframe bias and set stops beyond pattern edge |
chart patterns: the triangle family deep dive
A tight triangle funnels movement toward a decisive break, offering clean trade mechanics. These shapes condense market action into clear edges traders can use to set entries, stops, and targets.
Ascending triangle: bullish pressure at resistance
Structure: flat resistance with rising support. Repeated tests of the flat line show buyers stepping in at higher lows.
Entry is typically above the resistance level. Place a stop below the rising line and measure the target by the triangle’s height from base to resistance.
Descending triangle: weakening demand at support
Structure: horizontal support with falling resistance. Lower highs signal shrinking buying interest and a higher chance of a breakdown.
Traders watch for a close below support for a short trigger, with stops above the falling line and targets set by the left-side height.
Symmetrical triangle: neutral consolidation awaiting breakout
Converging lines create a balanced squeeze where direction is unresolved. Breakout magnitude often approximates the height of the triangle’s left side.
Volume usually contracts into the apex and expands on the breakout, strengthening the signal. Use nearby resistance levels and support zones to plan entries and avoid traps.
Practice tip: view triangles in the context of the larger trend. A formation in an uptrend more often acts as continuation; in a downtrend, reversal risk increases. Be patient as price coils—the cleaner and tighter the shape, the better the breakout quality.

Special and advanced formations used by professionals
Certain large-scale formations map future price and time targets with measurable rules. These advanced shapes help traders refine entries, stops, and targets with greater precision.
Cup and handle shows a rounded “U” base followed by a shallow handle. The orderly pullback in the handle lowers risk and often precedes a clean breakout that resumes the prior uptrend.
Harmonic setups (Gartley, Bat, Butterfly) and Elliott Wave use Fibonacci math and wave counts to define exact reversal zones. They give specific completion points and clear invalidation levels.
- Three Drives: three measured pushes that favor precise reversal execution in time and ratio.
- Quasimodo: a structural failure high or low that returns to the prior range, offering clear invalidation and targets.
- Broadening wedge & diamonds: expanding then contracting volatility; resolution often resolves opposite the last swing.
- Wolfe Waves: five-wave setups that project price and time targets via a defined line.
Pro tip: advanced setups demand meticulous measurement, patience, alignment with higher-timeframe structure, and consistent post-trade documentation to refine execution.
Gaps, volume, and breakouts: confirming the pattern indicates trend
When prices skip levels between sessions, the gap and accompanying volume reveal market conviction. A gap alone tells a story; volume and context tell whether that story leads to continuation or reversal.

Breakaway, runaway, and exhaustion gaps
Breakaway gaps start new moves. They occur at the edge of a base when sentiment shifts and a fresh trend begins.
Runaway gaps appear mid-trend and validate strength, often after a consolidation or measured continuation pattern.
Exhaustion gaps show up near a trend’s end and can signal a pending reversal when volume fails to support further movement.
| Gap type | Where it shows up | Trade implication |
|---|---|---|
| Breakaway | After base breakout | Enter on confirmation; stop below gap |
| Runaway | Mid-trend | Use for add-on entries; trail stop |
| Exhaustion | Late trend | Look for reversal; tighten risk |
Volume contraction during formation and surge on breakout
Volume usually falls while a shape tightens and then spikes on a true breakout. This volume behavior helps confirm the pattern indicates trend continuation or a reversal.
- Check for lower volume during base-building and a clear surge at breakout.
- Plan entries on confirmation closes; place stops beyond the gap or pattern edge.
- Account for backfills—prices often retest the gap zone; size risk accordingly.
- Watch pre-breakout tape for early pressure shifts that signal an imminent move.
Quick checklist for breakout quality: mature structure, volume surge, level clearance, and alignment with the larger trend. When these line up, traders gain higher odds and clearer risk control.
Top chart patterns traders use to predict future price movement
High-probability setups come from structures that show where market pressure gathers. These formations help traders use clear rules to join a move or step back when the signal fails.
High-conviction continuation: flags, pennants, and ascending triangles
Flags and pennants are brief consolidations after a sharp move. Volume usually contracts during the pause and then surges on resolution.
Ascending triangles show rising demand at resistance and often resolve higher. Use the pole or height to set targets.
Reliable reversals: head and shoulders and double tops/bottoms
Head and shoulders and double tops or bottoms provide necklines that act as clear confirmation points.
Enter on a clean break and consider a retest; place invalidation beyond the opposite shoulder or swing.
Context-driven patterns: wedges, rectangles, and channels
Wedges, rectangles, and channels rely on trendlines and parallel levels to frame trades. Watch direction, pressure, and volume to validate a breakout or breakdown.
“Not all breakouts are equal—evaluate structure maturity, cleanliness, and market backdrop.”
- Favor level breaks, retests, and momentum confirmation for entry triggers.
- Measure targets by pattern height or pole and align with nearby support and resistance.
- Scan multiple timeframes and mark the point of invalidation on the chart.
From pattern to plan: entries, stops, targets, and risk
Translate a visible setup into execution by listing entry criteria, stop placement, and target math. A clear plan turns a setup into a repeatable trade with defined risk and reward.
Defining entry triggers at breakouts and breakdowns
Entry rules should be objective: a close above resistance for a long, or a close below support for a short. Retests of the breakout add safety when volume confirms the move.
For ascending triangles use the breakout above the flat line as the trigger. Flags and pennants use a pole-measure entry on a confirmed breakout. Double tops and bottoms require a clean break of the neckline before entering.
Setting stop-losses at support/resistance and projecting targets
Place stops just beyond the opposite line or a nearby horizontal support to avoid normal range noise. Gaps may require wider stops to prevent backfill whipsaws.
Project targets by using the pattern height or pole length and refine targets with nearby resistance levels and support. Trail stops under higher lows or above lower highs as the trend develops.
- Use candlestick confirmation and volume surge to strengthen entry signals.
- Document risk per trade and size positions to the distance to invalidation on the chart.
- Take partial profits at interim resistance and let the remainder run to the measured target.
“A written checklist from signal to exit keeps emotion out of execution.”
| Setup | Entry | Stop / Target |
|---|---|---|
| Ascending triangle | Close above resistance | Stop below rising line; target = height from base |
| Flag / Pennant | Break above consolidation | Stop beyond structure; target = pole length |
| Double top/bottom | Neckline break | Stop beyond recent swing; target = pattern height |
Putting it together: technical analysis workflows for traders in the United States
A structured process that checks higher-timeframe bias, volume, and close-based levels yields cleaner signals. Start with a broad sector scan across U.S. indices, then narrow to specific symbols that match the larger market trend and volatility profile.
Multi-timeframe alignment and confluence with indicators
Align timeframes by confirming the daily or weekly trend before hunting lower-period entries. Use trendlines and closing-price levels to validate support and resistance.
- Ensure lower-timeframe entries sit with the higher-timeframe trend (uptrend or downtrend).
- Require candlestick triggers plus a volume expansion on breakout for confirmation.
- Combine a moving average, RSI, or MACD for added confluence after structure matures.
Backtesting and journaling to refine edge over time
Backtest your entry, stop, and target rules for each pattern and filter. Track period length of formations—longer, tighter setups often predict larger post-break moves.
Keep a trade journal that records setup quality, market context, and execution notes. Review results regularly to quantify expectancy and improve your trading edge in U.S. markets.
Conclusion
Recognizing structure in price action converts noise into a disciplined trading edge. Use clear formations—continuation and reversal—to set objective entries, stops, and measured targets that respect risk.
Map support resistance with closes and multi-touch validation, and watch volume and candlestick context to time entries and exits. Gaps and advanced forms add detail, but foundations remain essential.
Keep a strict workflow: scan, plan, execute, and review. Journal outcomes and backtest rules to refine your view of trend, trend reversal risk, and downward trend scenarios.
When structure, confluence, and risk management align, price movement becomes tradable. Apply these methods to your charts, iterate, and build a durable edge in U.S. markets.
FAQ
What is the role of pattern recognition in technical analysis?
Pattern recognition helps traders identify probable future price movement by spotting recurring shapes formed by price and volume. These formations, including continuation and reversal setups, give context to trend direction and potential entry or exit points without relying on fundamental data.
How do candlestick bodies, shadows, and color indicate trend direction?
The body shows the net price move for the period, while shadows reveal intraperiod extremes. Bullish candles typically have larger bodies and close near the high; bearish ones close near the low. Repeated candlestick behavior at key levels signals buying or selling pressure and helps confirm trend strength.
Which candlestick setups reliably signal bullish or bearish momentum?
Common bullish setups include engulfing candles and morning stars; bearish signals include bearish engulfing and evening stars. Single-bar signals like doji or hammer require context—support, resistance, and volume—to be actionable.
Why are trendlines, support, and resistance essential foundations?
Trendlines map directional bias while support and resistance mark supply and demand zones. Multi-touch levels and closes near these lines increase the validity of a setup because they show repeated market respect for those levels.
How do you draw accurate uptrends, downtrends, and consolidation ranges?
Use at least two confirmed swing highs or lows to draw a line and validate with additional touches. For ranges, mark clear horizontal highs and lows where price repeatedly reverses. Prefer closing prices for more reliable signals.
What makes continuation setups like flags and pennants useful?
Flags and pennants form after strong moves and represent brief consolidation before trend continuation. They work because momentum pauses and then resumes, often producing measured moves roughly equal to the prior thrust.
How do triangles differ: ascending, descending, and symmetrical?
Ascending triangles show rising lows and flat resistance, favoring bullish breakouts. Descending triangles show falling highs and flat support, favoring breakdowns. Symmetrical triangles feature converging highs and lows and are neutral—direction depends on breakout bias and volume.
When are rectangles and channels effective for trading the range?
Rectangles and channels work when price oscillates between parallel support and resistance with clear turns. Traders buy near support and sell near resistance, or wait for breakouts to capture directional continuation.
What are the signs of reversal formations like head and shoulders?
A head and shoulders shows a left shoulder, higher head, and lower right shoulder with a neckline. A close below the neckline with rising volume confirms a trend reversal. Inverse formations reverse the logic for bullish turns.
How do double and triple tops/bottoms signal exhaustion?
These formations form when price repeatedly fails to breach a level, showing sellers or buyers exhausting their push. A confirmed break of the neckline or support level signals a higher probability that the prior trend has ended.
What do rising and falling wedges indicate about momentum?
Rising wedges in an uptrend often warn of a bearish reversal as upward momentum wanes. Falling wedges in a downtrend typically precede bullish reversals as selling pressure decreases. Watch volume decline during formation and expand on breakout.
When are V-shaped and rounding bottoms meaningful?
V-shaped reversals point to sharp rejection and rapid change in sentiment; they matter when accompanied by high volume on the reversal. Rounding bottoms show gradual accumulation and are more reliable on higher-timeframe confirmation.
What defines the cup-and-handle and its breakout trigger?
The cup-and-handle forms as a rounded base followed by a shallow consolidation (handle). A decisive breakout above the handle resistance with increased volume often leads to a strong continuation move measured from cup depth.
How do harmonic setups and Elliott Wave add precision?
Harmonic patterns use Fibonacci ratios to identify high-probability reversal zones. Elliott Wave provides structure by labeling market cycles. Both require discipline and confluence with support/resistance and volume for reliable signals.
What role do gaps and volume play in validating breakouts?
Gaps—breakaway, runaway, exhaustion—signal shifts in sentiment. Volume contraction during formation followed by a surge on breakout confirms institutional participation and increases the likelihood of a sustained move.
Which setups offer the highest conviction for continuation or reversal?
High-conviction continuation setups include flags, pennants, and ascending triangles. Reliable reversals tend to be head and shoulders or confirmed double tops/bottoms. Always assess context, volume, and trend alignment.
How should traders define entries, stops, and targets from a formation?
Use clear triggers like close beyond breakout level for entries. Place stops beyond invalidation points—above resistance for shorts or below support for longs. Project targets using measured moves or pattern depth while sizing risk to a defined percentage of capital.
Why is multi-timeframe alignment important in a trading plan?
Aligning higher- and lower-timeframe bias provides confluence. Higher-timeframe direction sets the trend, while lower timeframes refine entry and risk. This reduces false signals and improves trade probability.
How do backtesting and journaling improve pattern trading?
Backtesting validates edge and refines filters like timeframes, volume thresholds, and stop placement. Journaling documents outcomes, emotional responses, and statistical edge so traders can iterate and improve over time.